
Windows users experience a lot of different issues, be it networking issues, hard drive issues, or any other. They don’t always get fair treatment. One of such problems related to the networking that Windows users face is “the default gateway is not available”.
This problem can be annoying since it prevents you from accessing the internet. There could be several reasons why you may be facing this issue. It may be either due to incorrect IP settings, outdated network drivers, incorrect routers settings, or in some instance, it could be the McAffee security solutions program causing this problem.
Well, whatever the reason may be, you are blocked from accessing the internet, and therefore, it is important to fix this issue as soon as possible to start using the internet. Here are some fixes that you can apply to fix the default gateway is not available error:
Removing McAfee Security Programs
Removing McAfee Security Solutions and any other McAfee program will most likely fix this issue if it caused by any of the McAfee security programs. Just go to the Control Panel and remove all the McAfee security programs that are on your PC. After uninstalling McAfee programs, this issue will be resolved.
Updating Network Adapter Drivers
Updating your network adapter drivers may also help resolve this issue. If your network adapter driver is not updated to the latest version then you may be getting the default gateway is not available error. Updating your network adapter driver might help resolve this issue if the cause is your network adapter driver, however, it doesn’t mean that it will surely resolve your problem.
You can update your network adapter driver by either going to the network adapter manufacturer website and downloading the latest version or through the Device Manager:
The steps are as follow:
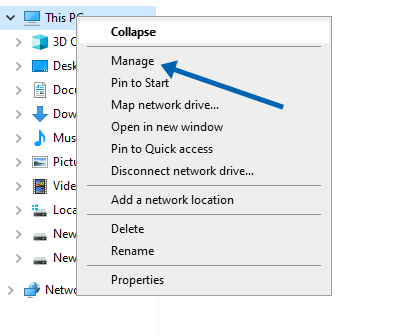
- Open the Device Manager by right-clicking on “My Computer” and select Manage or type Device Manager in the Run box and press Enter.

- Expand the network adapter by clicking on it.
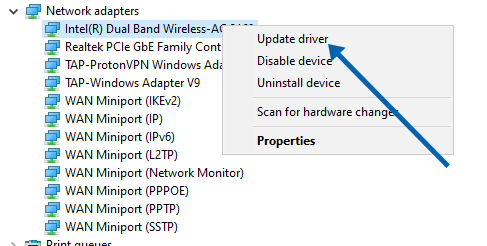
- Click on your Network Adapter Driver and select the Update Driver Software option.
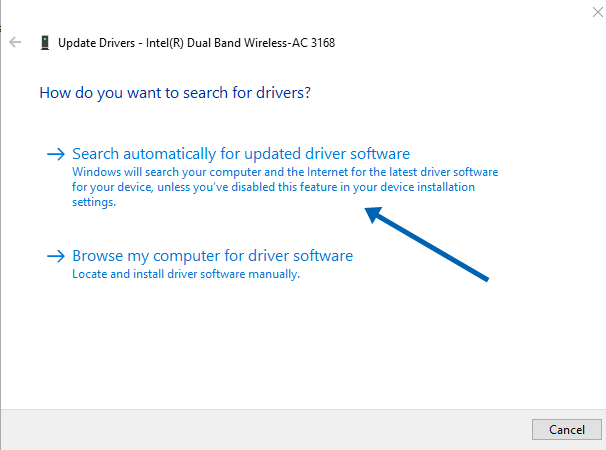
- Now, select the Search Automatically for Driver option. Windows will automatically search for the driver over the internet and install it.
Uninstalling Network Adapter Drivers
Another possible solution to this fix is to uninstall the network adapter drivers completely from your PC. You should not be worried about the non-existence of the network adapter drivers. Once you uninstall the drivers, you will have to re-install the drivers but Windows automatically detects the absence of the drivers and reinstalls them. Here is how you can uninstall your network adapter drivers:
- Open the Device Manager by right-clicking on “My Computer” and select Manage or type Device Manager in the Run box and press Enter.
- Expand the network adapter by clicking on it.
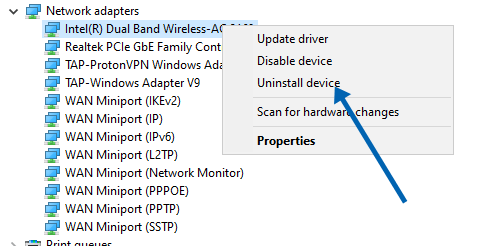
- Click on your Network Adapter Driver and select the Uninstall device.
- After the driver has been uninstalled, reboot your PC.
- After the reboot, the Windows will automatically identify and install the drivers.
Changing Wireless Frequency Band
Sometimes this issue can be caused by frequency incompatibility between your WiFi router and network adapter. You recently switched to the 5 GHz band or bought a new WiFi router that is using the 5 GHz frequency. In such cases, when the WiFi router is transmitting the signals on the 5 GHz frequency band, you get this error because your network adapter does not work with this frequency. Switching to the 2.4 GHz frequency will solve this problem. This can be done from the admin panel of the router.
Changing Wireless Mode
Some users have also reported that this problem can also be fixed by switching the wireless mode from 802.11g/b to 802/11g. Here is how you can switch your wireless mode.
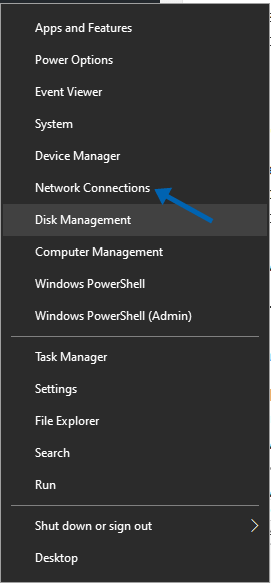
- Open Network Connections by left-clicking on the Windows icon and selecting Network Connections or press Windows + X key and select Network Connections.
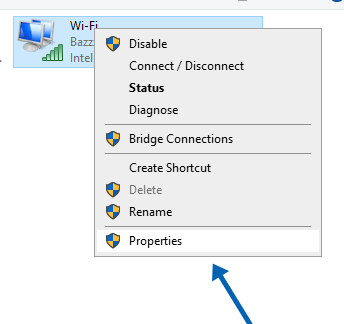
- Locate your wireless adapter and right-click on it and select Properties from the drop-down menu.
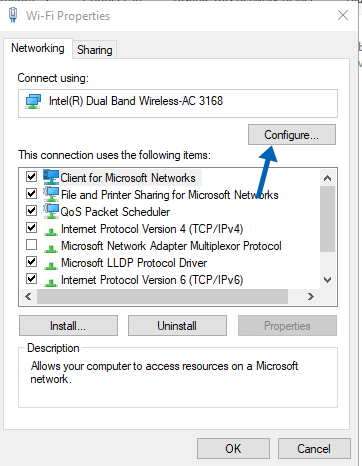
- Click on Configure.
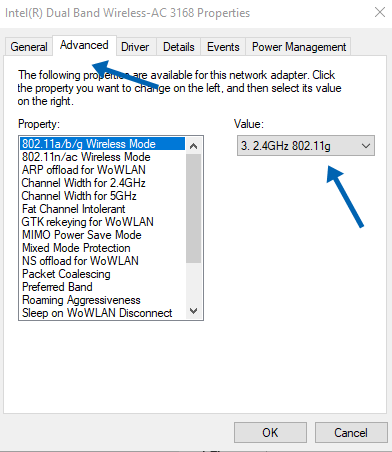
- Go to the Advanced tab and select Wireless mode.
- Now, from the drop-down menu, select 802.11g, and save the changes.
Using netshell reset command
Users have also reported that using the netshell reset command to reset your TCP/IP also fixes this issue. Here is how you can do so:
- In the Start Menu search box, type cmd.
- Right-click on Command Prompt and select Run as administrator.
- Now, type the following command:
netsh int ip reset
- Now, restart your PC and see if the problem is fixed or not!