
![]()
D-Link is a router manufacturing company that has been known for making quality routers for years. The company has been in the business for quite some time and knows what it is doing. All the routers that D-Link manufactures are designed and built in such a way to provide the maximum performance. You get top-performing WiFi Routers providing consistent speeds and long-range signals with many other features, so you can game online, stream movies, shop, and more with multiple devices all at the same time.
If you just purchased a new D-Link Wi-Fi Router then you need to set it up before you can get your Wi-Fi connection up and running. D-Link’s Router Setup process is simple and easy, you can set up your D-Link Router in just a few minutes. You will need some extra things other than D-Link Router and your Modem which are included in your router box. This includes:
- Ethernet cable
- Wi-Fi Configuration Card
- Quick Install Guide
Here is the procedure on how you can set up your D-Link Router:
- The first thing that you should do is to connect your router and modem. To do so, take an ethernet cable and connect both the modem and D-Link Router on the WAN port. This port is usually differently colored from the rest of the ports to separate it.
- Once both the router and modem are connected and a connection is established, connect your computer to the network, wirelessly or using a wired connection.
- Once you are connected to the network of D-Link Router, open a web browser and go to http://192.168.0.1 or http://192.168.1.1.
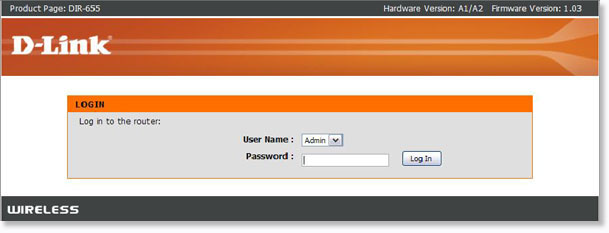
- A login page will appear. Log in using the login credentials. The default username is admin and the default password is a blank field.
- You will be now prompted to the D-Link Quick Router Setup Wizard. Click on Next to continue. (Keep in mind that the setup wizard will appear only when configuring the router for the first time. If the router has been previously configured then you need to reset your router and then follow the procedure)
- The router will scan and determine the type of your internet connection. If the scan was successful then the internet setup will be done automatically and you needn’t do anything. However, if the scan was not successful then you will have to manually select the type of your internet connection. DHCP Connection or PPPoE and enter the required details provided by your ISP.
- Also, enter the information for your wireless network including the SSID and password.
- You will also be asked to set a password for your router. This is the password that is required to login to the admin interface of the router.
- Select your time zone.
- After this a summary of the wireless setting will be displayed. Click on Save. The router will now reboot and after it reboots your new settings would have been applied and the setup is now complete.
Once you have set up the router, here are some tips that you should follow to get the most out of your router.
- You should make sure that you place the router at such a place, preferably in the center of your house so, that the signals are able to reach even in the dead and blind zones.
- Also, prefer placing your router at an elevated level from the ground to get the maximum signals.
- Avoid placing your router close to any electrical device or heavy objects as such devices can interfere with the signal of your Wi-Fi and you can face weak and poor signals in some areas due to this.
- Limit the number of connected WiFi devices in order to enjoy the maximum internet speed.